


Towel Radiator Wall-to-Pipe Distance and Projection UK

Quick answer
Reducing a towel radiator's projection is a model-specific installation question. Check the bracket adjustment range, pipe alignment, selected valve dimensions and required clearances together. Do not push a connected radiator towards the wall or assume corner valves always make it fit closer.
Separate three different measurements
| Measurement | What it describes |
|---|---|
| Connection centres | Spacing between specified connection centre points; confirm the reference points. |
| Wall-to-pipe centres | Distance from the finished wall to the specified pipe or connection centreline. |
| Overall projection | How far the assembled radiator or fittings extend from the wall. |
Existing pipe positions, valve geometry and radiator stand-off are related. Moving the radiator changes the alignment that the connected assembly needs to accommodate.
What adjustable brackets can do
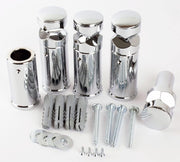
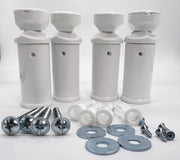
Some models allow a stated bracket range. That is not permission to move the rail arbitrarily or substitute unrelated brackets. Use the manufacturer's permitted positions, fixing arrangement and minimum space.
Ask the installer to assess adjustment before any retaining screws are released. A filled radiator is a supported load; the pipework must not carry it or be strained by movement.
Valve and pipework options
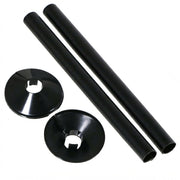
Compare the actual dimensions and pipe-entry directions of suitable straight, angled or corner valves. Their names alone do not rank them by installed depth. A compact valve may solve one layout but be incompatible with another.
Use the pipe-centre measurement guide to record the existing arrangement. If alignment cannot be achieved within the permitted assembly, discuss pipework changes, another compatible component or a different radiator.
Keep the required clearances
There is no universal 10–20mm wall gap to substitute for the model instructions. Check airflow, brackets, control access, cleaning and any electrical component requirements. A visually flush result is not evidence of a suitable installation.
For the room layout, use the placement checklist. Confirm the specification of any replacement brackets or valves before ordering; the category name does not establish compatibility.
A replacement or retiled wall needs a fresh depth comparison
Record depth from the finished wall surface used on the new drawing. New tiles or another finish can change the relationship between that surface and existing pipe centres. Do not reuse an old stand-off measurement without checking the final wall and the complete new fittings.
Ask the installer to compare the permitted bracket range, radiator position, valve dimensions and pipe alignment together. Adjustment that works at one bracket does not prove the whole assembly can move without strain. Keep the required operating and maintenance access.
Use the wall-support and position checklist and the valve geometry guide with the pipework handover record. The final arrangement belongs in the installation plan, rather than being improvised after the radiator is connected.
If the fit still does not work
Stop rather than forcing the assembly. Provide the installer with the model drawing and photographs of the pipes and brackets. Return to the installation planning guide to review the complete arrangement.
Frequently asked questions
Is wall-to-pipe distance the same as the radiator’s overall projection?
No. Wall-to-pipe centres measure to the specified centreline; overall projection describes how far the radiator or fittings extend from the finished wall. Check the reference points on the exact drawing.
Can I move a connected towel radiator closer to the wall?
Do not push or force the connected assembly. Ask the installer to assess the permitted bracket range, support, pipe alignment and fittings together before any adjustment.
Will corner valves always make the installation shallower?
No universal rule applies. Compare the actual dimensions, connection directions and compatibility of the selected valves. The shape name alone does not establish the installed depth.
Can adjustable brackets correct every wall-distance mismatch?
No. They have a specified permitted range and do not resolve every pipe, valve, support or clearance issue. Use the complete model instructions and have the installer assess the arrangement.
Should I remeasure after adding tiles or a wall finish?
Yes. Compare the final finished surface with the existing pipe positions and the new drawing. An old measurement from the previous wall face may not describe the finished installation.
What minimum wall gap should I use?
Use the selected model’s requirements for brackets, clearances, controls, cleaning and any electrical components. There is no single gap that can replace the exact installation instructions.

About the Author
Huseyin Aras is a Bathroom Heating & Product Sourcing Specialist at Coventry Towel Radiator with over 18 years of experience in towel radiators, bathroom heating systems, supplier sourcing, and modern home comfort solutions.
About Huseyin and his guides